
Log In to Your Client Dashboard
-
Visit the Ruachost Client Area.
-
Sign in using your email address and password.
Access the DNS Manager
From your Ruachost dashboard:
-
Navigate to Domains > Manage DNS.
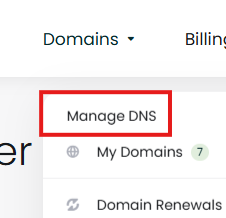
-
Use the search bar to locate your domain (e.g.,
deploy.ng).
Note: If you can't find your domain in the search box Click on the Add DNS Zone button on the top right, select your domain and input the IPV4 address of your hosting account.
-
Click the edit icon next to your domain under the “DNS Zones” section.

Step 1: Understand Your DNS Zone Records
Once inside the DNS Zone Editor, you’ll see a list of existing records. these include:
-
SOA Record: Defines the start of authority for the domain.
-
A Record: Points
deploy.ngto IPV4 address. -
NS Records: Specifies name servers.
-
MX Record: Directs mail to yourdomain.com.
-
CNAME Records: Aliases like
www,mail, andftppointing to yourdomain.ng.
Each record includes:
-
Name: Subdomain or root (
@). -
Type: A, CNAME, MX, etc.
-
TTL: Time to Live (how long the record is cached).
-
RDATA: The actual data (IP, domain, etc.).
Step 4: Add or Modify DNS Records
To add a new record:
-
Click the "+ Add Record" button.

-
Choose the record type (e.g., CNAME).
-
Fill in the Name, TTL, and RDATA fields.
-
Example: To point
wwwtowww.yourdomain.com, set:-
Type: CNAME
-
Name: www
-
TTL: 14440
-
CNAME: www.yourdomain.com
E.g(Using deploy.ng)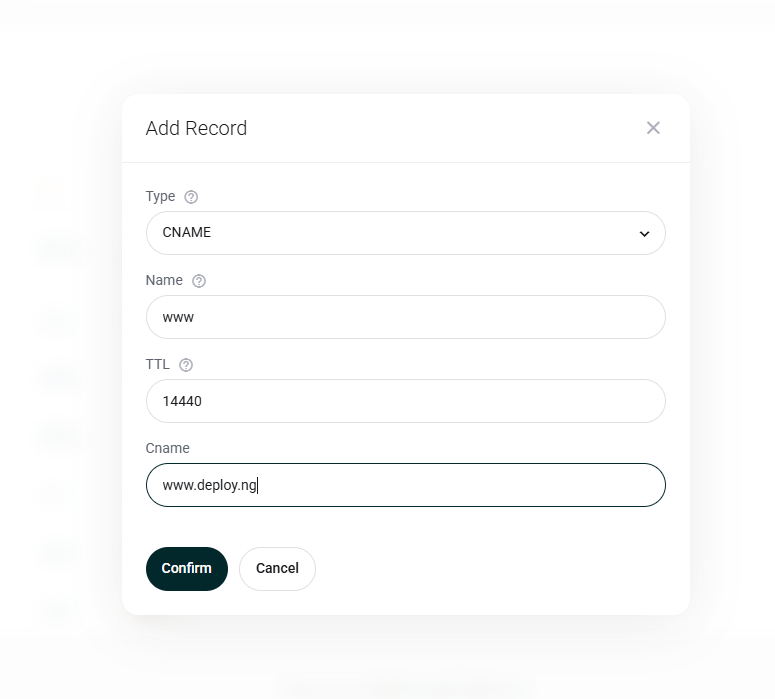
-
-
-
Click Confirm to save.
To edit or delete existing records:
-
Use the edit or trash icons next to each record.
Notes
-
You can also manage multiple domains using the Bulk Management icon next to the DNS Zone menu.
-
You can create and upload backup records with the Backup icon located next to the DNS Zone and Bulk Management options.


