
WebHost Manager (WHM) includes built‑in tools to back up and restore account data. This ensures that customer websites, emails, and databases can be recovered in case of accidental deletion, corruption, or server issues.
Why Use WHM Backups?
-
Protect customer data against accidental loss.
-
Restore accounts quickly after server issues.
-
Migrate accounts between servers with minimal downtime.
-
Provide peace of mind to resellers and administrators.
Configuring Backups
-
Log in to WHM.
-
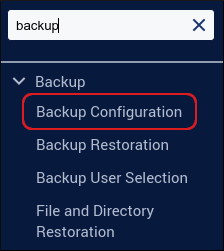
In the search box (top left), type backup.
-
Click Backup Configuration.
-
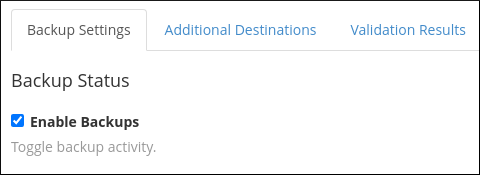
On the Backup Settings tab:
-
Enable Backups → Check this box to activate backups.
-
Backup Type → Choose:
-
Compressed → Saves disk space, takes longer to create.
-
Uncompressed → Faster, uses more disk space.
-
Incremental → Only saves changed files since the last backup.
-
-
Scheduling and Retention → Set how often backups run and how long they are kept.
-
Files and Databases → Select which user accounts, system files, and MySQL databases to include.
-
Backup Directory → Define where backups are stored.
-
-
Click Save Configuration.
Enabling Remote (Offsite) Backups
WHM supports storing backups on external services:
-
Amazon S3
-
Backblaze B2
-
Google Drive
-
FTP, rsync, SFTP, WebDAV
To configure:
-
In Backup Configuration, go to the Additional Destinations tab.
-
Select the desired storage service.
-
Enter authentication details (API keys, credentials).
-
Click Save and Validate Destination. Backups will now be stored remotely.
Restoring Data from Backups
Restore by Account
-
In WHM, search for Backup Restoration.
-
Click the Restore by Account tab.
-
Select the user account to restore.
-
Choose the backup date.
-
Select options (subdomains, mail files, MySQL databases).
-
Click Restore.
Restore by Date
-
In WHM, search for Backup Restoration.
-
Click the Restore by Date tab.
-
Select the backup date.
-
Choose the account to restore.
-
Select options (subdomains, mail files, MySQL databases).
-
Click Restore.
Notes
|


